

How To Draw Shoulders In 3/4 View
How to depict a neck and shoulders
When learning how to describe a neck and shoulders, it tin oftentimes be challenging to show the volumes in our work, as we are used to seeing people front-on. Merely drawing an anatomically right neck and shoulders will do wonders for your figure and portrait drawing so it's a skill worth persevering with.
This tutorial will accept you through the steps y'all need to follow to depict a neck and shoulders, focusing on the individual body parts, including things to keep in heed regarding bones and central musculus groups. Want to draw the rest of the body? You lot'll discover all yous need in our collection of how to draw tutorials. Alternatively, you could try this guide to the best figure drawing books or this effigy cartoon tutorial.
How to draw a neck and shoulders: Things to consider
If yous're learning how to draw a neck and shoulders, we recommend starting lightly with the gesture equally fifty-fifty though the neck and shoulders seem quite chunky and static, they have a surprising amount of variety in their poses. If y'all are unsure of the angle of the shoulders, compare them to a horizontal to check which way they are tilting. Usually a pencil held upwards in the air volition exist sufficient.
There are three major forms at work here; the neck, the shoulders, and the ribcage. An effective tactic for drawing the shoulders at different angles and poses is by treating the gesture of the shoulders equally a diamond that fits around the connected forms of the neck and rib cage. This simplifies the behaviour of the basic underneath – the scapula and collarbones – and gives us something to build on. Another issue beginners may have with the neck is making it expect apartment – similar a paper cutout doll – every bit it smoothly transitions between the trunk and the head.
Nosotros can further push the sense of form by treating the cervix every bit a flexible cylinder that passes through the centre of the shoulders, drawing through where information technology connects to the ribcage and the caput as if those forms were transparent – there is no impairment in erasing these early exploratory lines afterward.
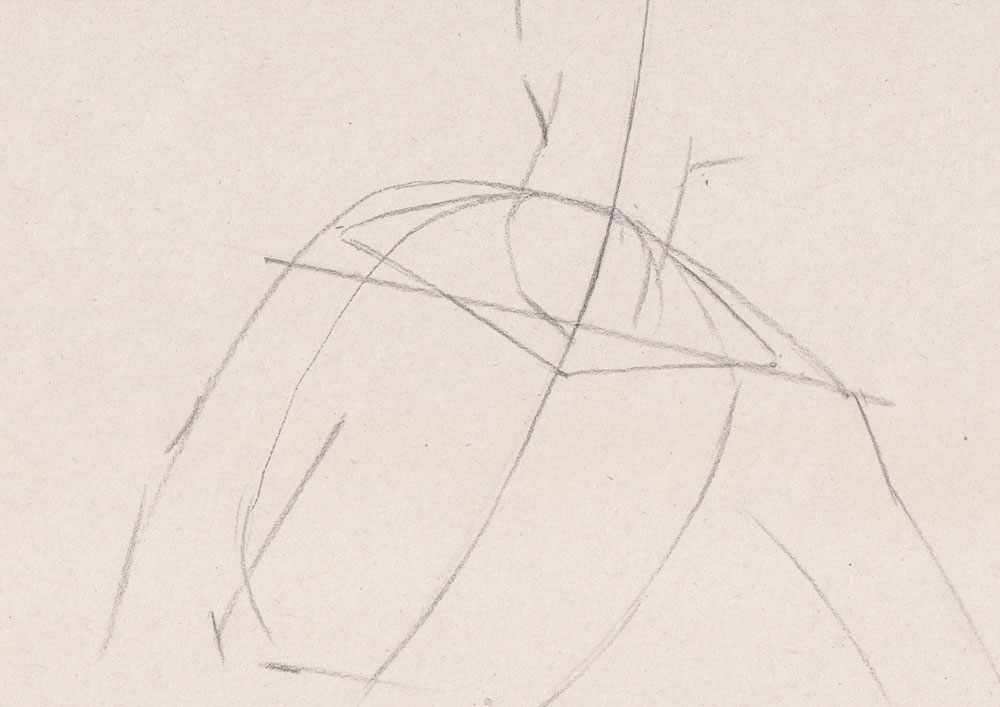
01. Brainstorm with gesture

(Epitome: © Lancelot Richardson)
Starting with the gesture, we want to find the sweeping line of the neck through to the body – this is going to describe how the caput bends abroad from the rib cage. Then we tin can place the tilt of the shoulders. You tin also block in the arms, showing how their gesture flows across the cervix. The place where the neck and ribcage connect has been roughly indicated with a circumvolve, forming the base of operations of the neck cylinder.
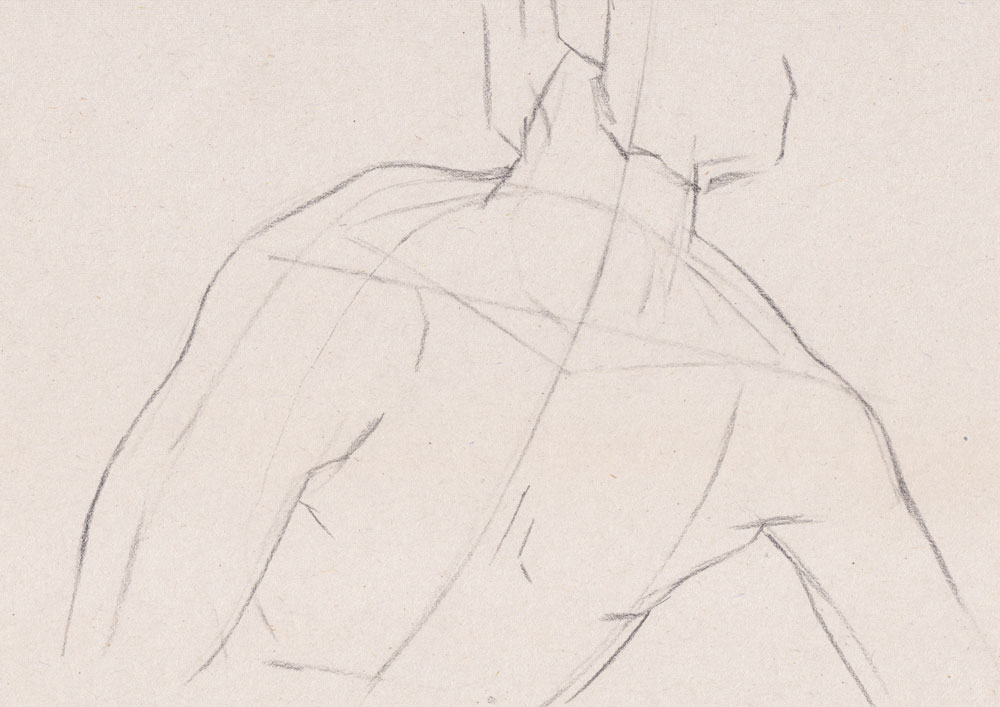
02. Mark the diamond of the shoulders
(Image: © Lancelot Richardson)
With our gesture indicating the tilt of the shoulders, we are going to mark a diamond. This is to describe the angle of the collarbones, and if we were to imagine what was going on around the other side, the scapulae at the dorsum. These bones connect at the shoulder and pivot around the pit of the neck. Look for little bumps or shadows at the tiptop of the shoulder and pit of the cervix for the bones that draw this.
03. Sketch the major forms of the shoulders
(Prototype: © Lancelot Richardson)
Hither nosotros are sketching in a rough outline to contain the shoulders. Pay shut attention to the negative infinite betwixt the neck and the shoulders – if you lot are imaging a line connecting the chin to the shoulder, you can create a closed shape. At this point, the principal intention is to work out the proportions of what we see and ensure things like the tilt of the shoulders look correct. Draw lightly – this is to human activity as a scaffold for us to build on with anatomy.
04. Observe and draw the collarbones
(Image: © Lancelot Richardson)
The collarbones are the primary bones we volition easily notice in the neck and the shoulders (at the back of the neck, we will see the scapulae and the spine). Look for where we tin can see the bone below the skin – often this is virtually apparent on the underside of the collarbone, at the pit of the neck and the tiptop of the shoulder. The collarbone will accept a distinctive 'S' curve, but changes a picayune from person to person.
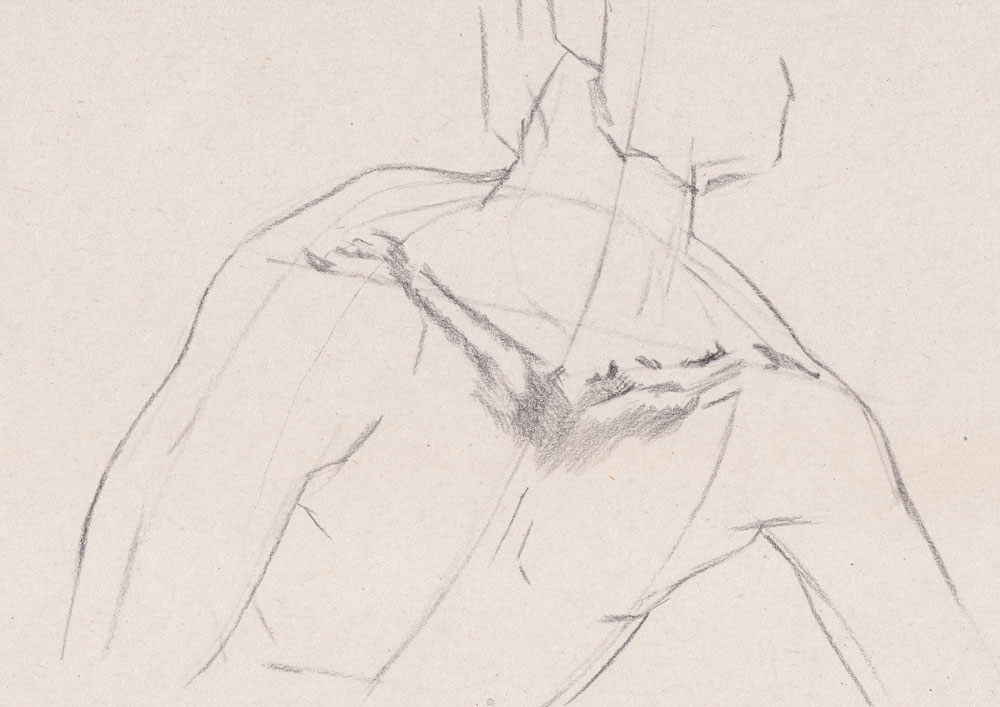
05. Motility onto the neck
(Prototype: © Lancelot Richardson)
The nigh visible muscles seen here are the sternocleidomastoid pair, which originate from the back of the skull, wrap around the cervix and carve up in half, attaching to the top of the collarbone and in the pit of the neck. At that place are many other small muscles in the neck that we don't usually encounter, unless someone is very lean. This pair is essential for describing the twists and turns of the neck, and tin can be seen quite conspicuously on most people.
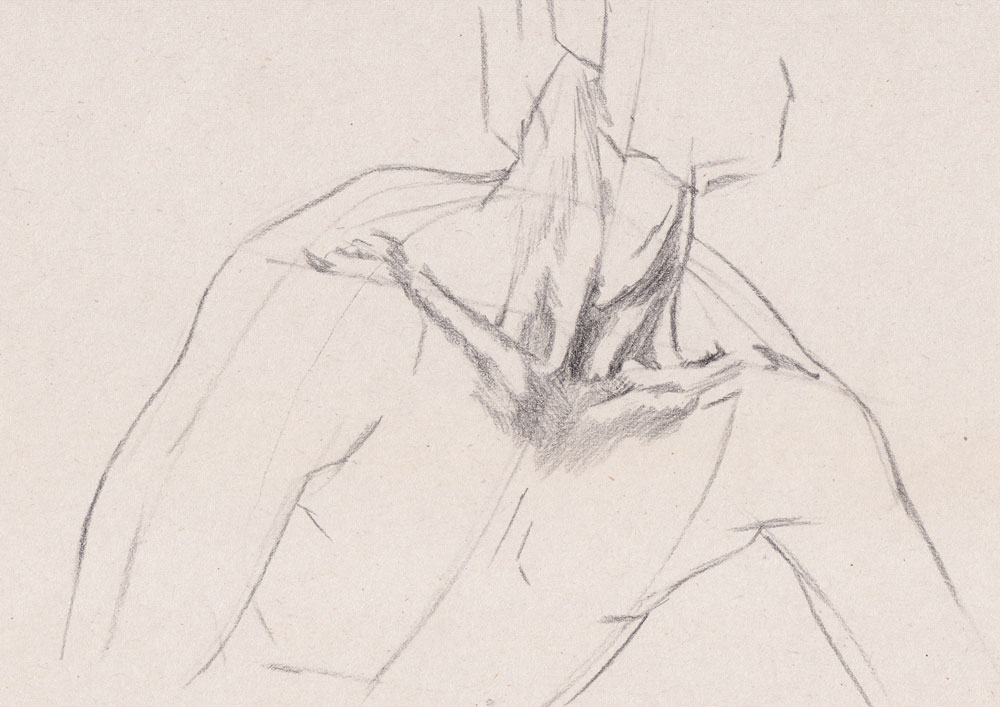
06. Capture the trapezius muscle
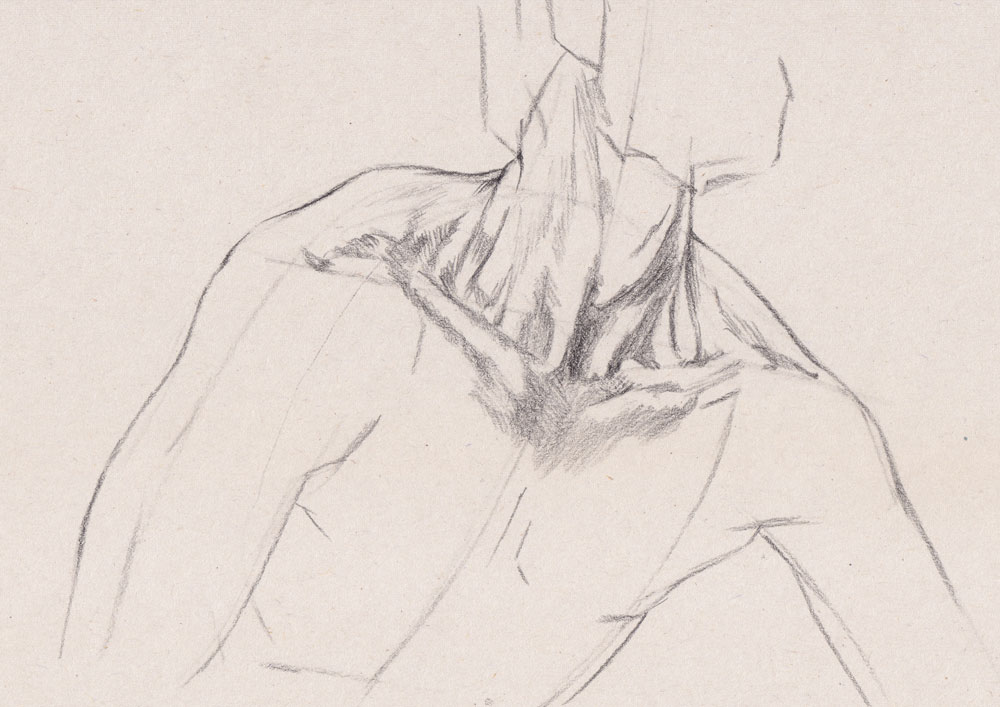
(Epitome: © Lancelot Richardson)
The trapezius is a very big, flattish muscle that encompasses parts of the neck, shoulder and back. It is very useful in describing how the forms of the neck overlap with the shoulder every bit information technology attaches to the back of the skull and wraps around the shoulder to the collarbone. Capturing the overlap of the neck, that sits in front hither, with mass of this muscle as information technology wraps around to the forepart helps to describe exactly how the forms interlock.
07. Add the deltoid muscle
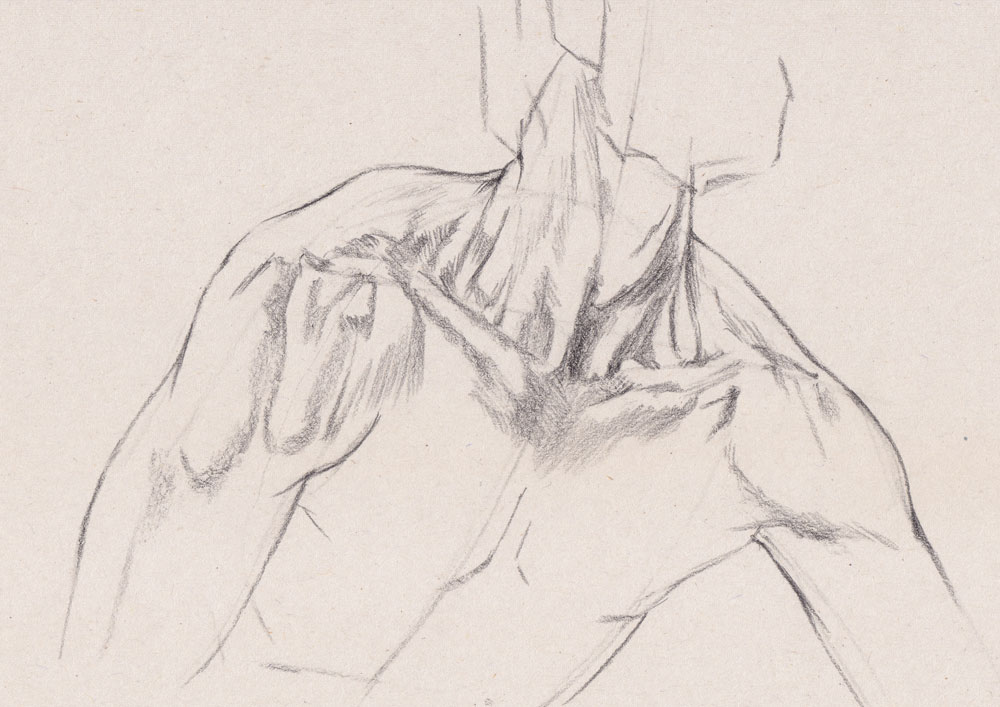
(Image: © Lancelot Richardson)
The deltoid is a muscle that wraps all the way around the pinnacle of the arm and attaches to the collarbone and scapula. On most people, it looks fairly apartment, but understanding this wrapping behaviour will aid you convey the subtle forms yous run into. It can be idea of as having a forepart, side, and back portion. In the eye of the top of the deltoid, the collarbone and scapula encounter, creating a dimple or a bump, depending on the pose, and the model'southward body blazon.
08. Mind the gap
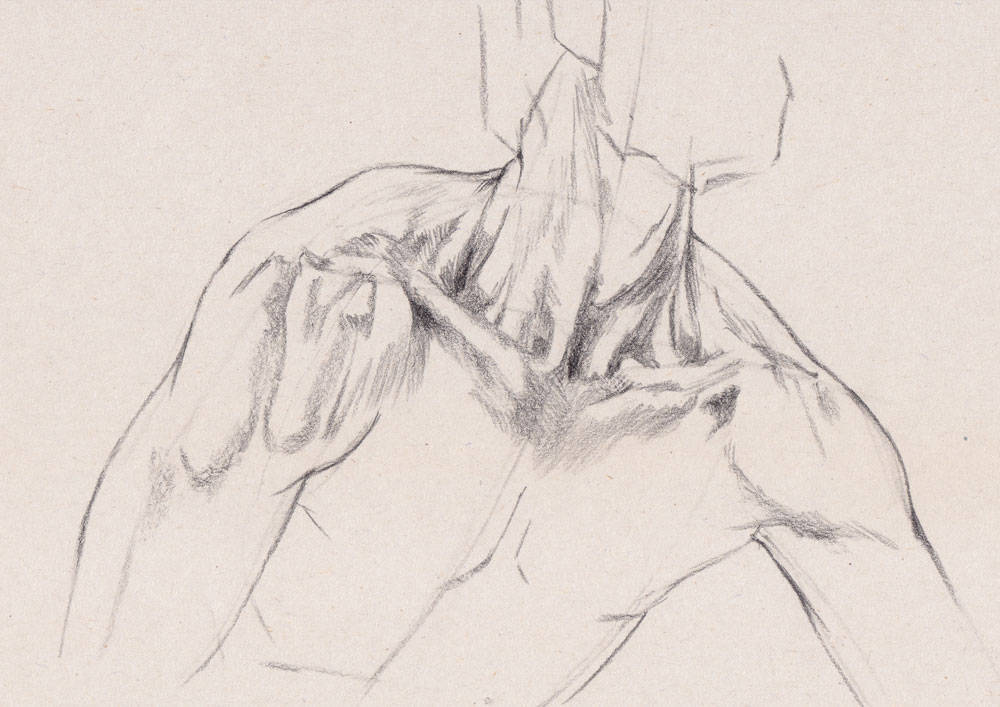
(Paradigm: © Lancelot Richardson)
There are several important dimples or 'fossa' effectually the neck and shoulders – gaps left between where muscle groups interlock around the shoulders and neck. These spaces assist imply the position of muscles without the demand to draw everything. One trouble beginners take with anatomy is potentially over-rendering the muscles. Always err on the side of simplicity – draw what you encounter. Wait for small details similar these to imply the behaviour of the
muscles underneath, rather than trying to draw out the shapes of the muscles.
09. Lay in shadows
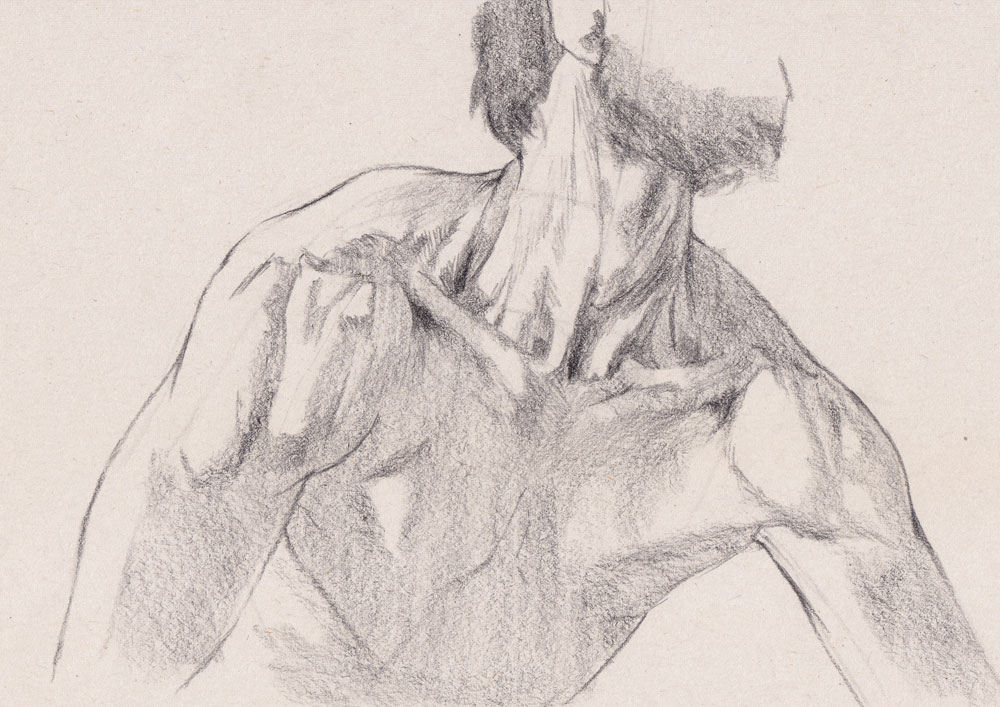
(Image: © Lancelot Richardson)
Here the shadow shapes have been blocked in. With the traversing of the anatomical features, nosotros are tying together knowledge and ascertainment in the drawing. Shadow is a valuable asset to describing forms, as we begin to see the roundness of the shoulders and the more than cylindrical natural shape of the cervix come up across. Try to detect i dark half and ane calorie-free half to brainstorm with; here we accept kept the shading flat and even.
x. Emphasise features
(Image: © Lancelot Richardson)
We have already marked out a lot of the anatomy we can see. This is a proficient chance to push the shadows of any important features, such as the collarbones, or observe ones you missed – for example, hither the Adam's apple has been properly rendered in, and we've antiseptic the overlap of the deltoid on the left shoulder. Try not to overwork these – the neck has quite subtle features – merely be on the look out for tiny details. The more beefcake y'all learn, the ameliorate you become at spotting these.
eleven. Describe forms
(Image: © Lancelot Richardson)
Using hatching marks, nosotros can offset to add volume to the shadows and push some areas darker in tone. This will assist depict the forms of the cervix and shoulders on pinnacle of our flat layer of shading. This area of the body has quite complex and child-bearing surfaces. Think well-nigh how the peel and muscles are wrapping around the cervix, and transitioning down to flow around the shoulder. Ensure your marks follow the surface of the pare, like a sculptor's hands. Thinking about the management the muscles are pushing in helps with this too.
12. Tighten up the outline
(Image: © Lancelot Richardson)
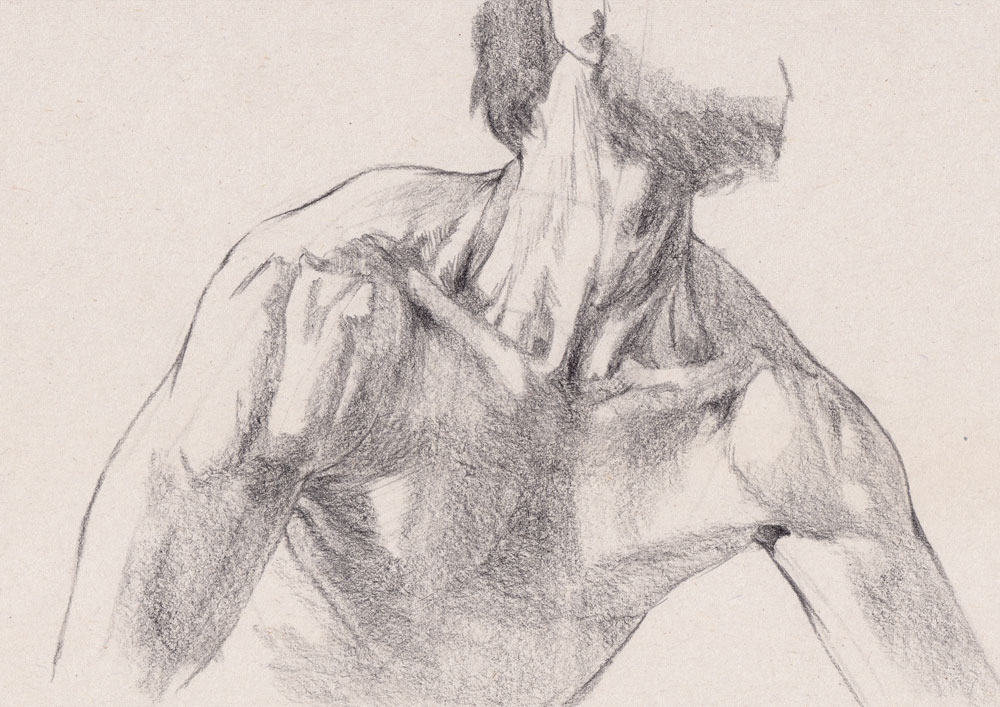
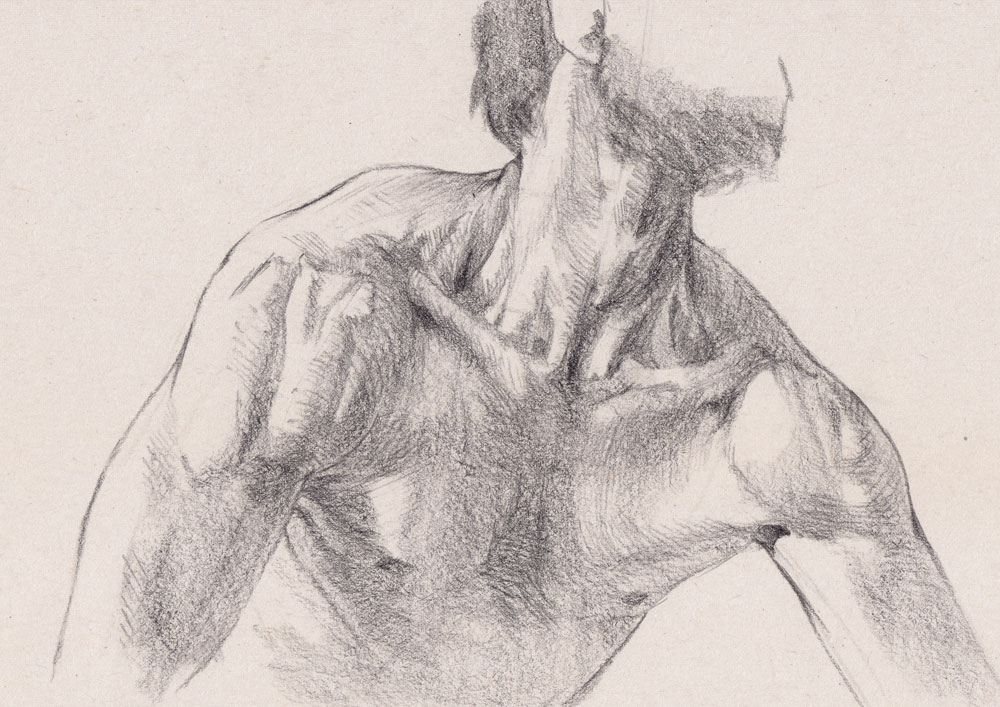
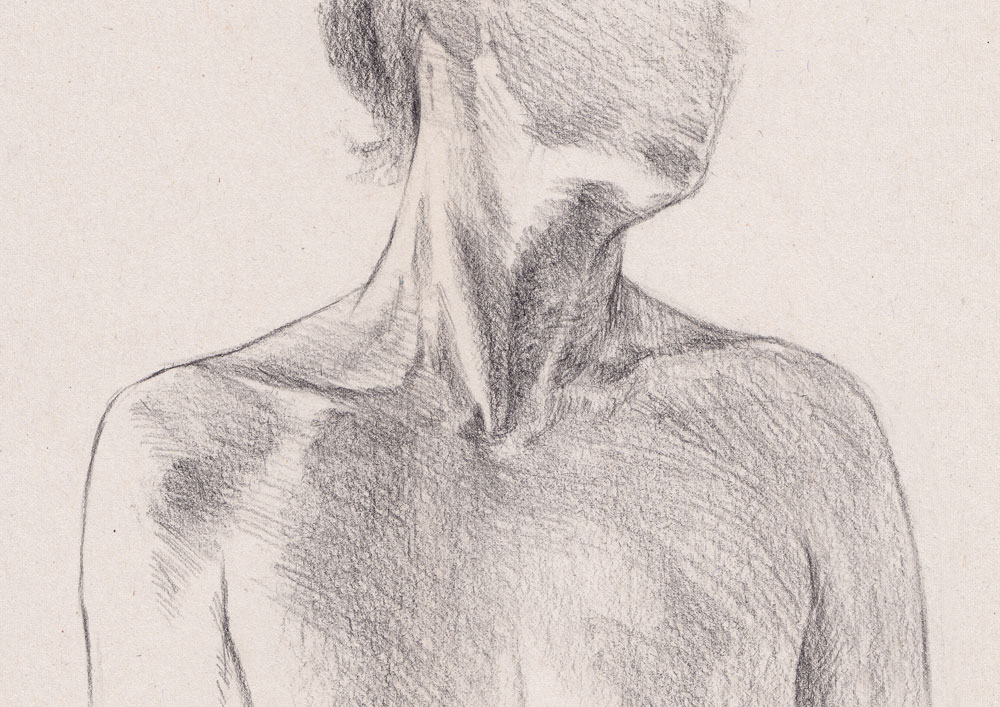
This is our final pass around the outline of the trunk. The neck and shoulders requite lots of excuses to vary your lines – for instance, thickening and losing the edges of the outline in shadow areas such as under the armpit. In light areas, information technology is a good thought to sharpen lines, or even break them in a few places. A uniform outline around our figures gets boring very fast, and these minor changes in line-piece of work go especially effective when we are drawing figures with less obvious musculature, as shown in the second image.
13. Add finishing touches

(Image: © Lancelot Richardson)
In this final stage, we'll work around the drawing looking for the concluding few details to include. This is also a proficient time to emphasise the edge of the shadow. Make the border a bit darker, to ameliorate dissimilarity, and use small amounts of hatching to create softer transitions on the rounder forms such every bit the deltoid. Like with the outlines in step 12, looking for variety in the edges of the shadows creates a more than interesting finish result.
This content originally appeared in Pigment & Draw: Oils. Yous can buy the Oils bookazine here . Or explore the rest of the Paint & Draw bookazines .
Read more:
- How to describe a head: A complete guide
- How to draw an arm
- How to draw hands
Related articles

Source: https://www.creativebloq.com/how-to/draw-neck-and-shoulders
Posted by: garrendoperelpland.blogspot.com
0 Response to "How To Draw Shoulders In 3/4 View"
Post a Comment